Expert advice on how to repair and replace wood siding, including how to fix holes, repairing warped wood, and replacing wood siding shingles and boards.

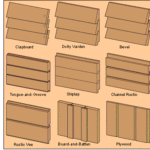
Wood siding comes in many forms, including several types of boards, shingles, and sheets. If you have woodworking skills, you can tackle small repairs by duplicating the way the siding is installed. Special tools such as shingle-nail pullers may be needed for certain jobs.
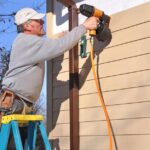
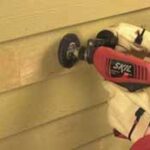
Large repairs generally require more equipment and more hands, and the work becomes more difficult the higher up the wall you go. If the work extends beyond replacing a board or a shingle or two, or you’re not used to handling a power circular saw or similar carpentry tools, you may want to hire a handyperson, carpenter, or local siding contractor to accomplish the job.
As you repair damage, identify what caused the damage, and correct the problem promptly.
For example, if your wood siding was damaged by leaky gutters or poor drainage from the downspouts, correct those problems before more damage develops.
Keep an eye out for dry rot and termite damage. Both are found on exterior as well as interior wood and can cause serious structural damage to your house. Dry rot is crumbling wood caused by a fungus. Termites bore tunnels through wood; you’ll sometimes see their wings or the castings they push out. Call pest control professionals if you find termite damage.
If paint problems are confined to a small area, you can touch them up. If they are more extensive, you may need to repaint the entire wall or house. Before painting, solve the cause of the problems that caused them. For more information, please see Exterior Painting.
Wood Board Siding Repairs
Siding is most vulnerable to water infiltration at vertical joints, such as where doors and windows intersect, or where siding boards butt against one another. A good way to keep water from seeping between boards is to apply caulking compound. It’s available in colors to match natural or painted finishes.
Choose a quality caulk that will maintain its elasticity over a range of temperatures. Cut the tube’s tip at a slight angle, and push it into the joint as you apply the caulk.
How to Repair Holes in Wood Siding
For repairs that will match natural-wood siding, you’ll want to use stainable wood putty. If you intend to paint the patched area to match the siding, use pre-mixed bridging and patching compound, sold at paint stores and home improvement centers. Test your touch-up paint beforehand to make sure you have a good match.
Follow the label directions. With most wood putty fillers, you:
- Remove any loose material from the hole, and brush the hole clean, using a stiff bristle brush.
- Apply the filler with a putty knife. Small holes require only one application. Large or deep holes call for building up the patch with several layers, allowing each to dry before applying the next.
- Sand the surface. Begin with coarse sandpaper and work your way to a finer grit. Then the patch to match the rest of the siding.
How to Fix Warped Wood Board Siding
If board siding is butted together too tightly during installation, it may warp when moisture changes cause it to expand. You can try pulling a warped board so that it’s flat and tight by driving a couple of long, galvanized screws through the siding into studs (drill pilot holes to avoid splitting the siding). But chances are good that you’ll need to slightly shorten the warped board, and then refasten it.
Here’s how:
- If the siding boards seem to be jammed together at the ends, pry out the nails from the warped area, and continue pulling nails (or you can cut them with a hacksaw blade), working your way toward the nearest end of the siding board.
- Pry the end of the board away from the house and put a block behind it. Be careful not to damage any building paper beneath the siding.
- Shorten the board. Sometimes it’s easiest to do this with a saw; other times a rasp, plane, or perforated rasp works better. Allow about 1/16 inch of clearance to the next board. Replace the board and re-nail it.
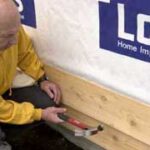
Repair or Replace Damaged Wood Board Siding
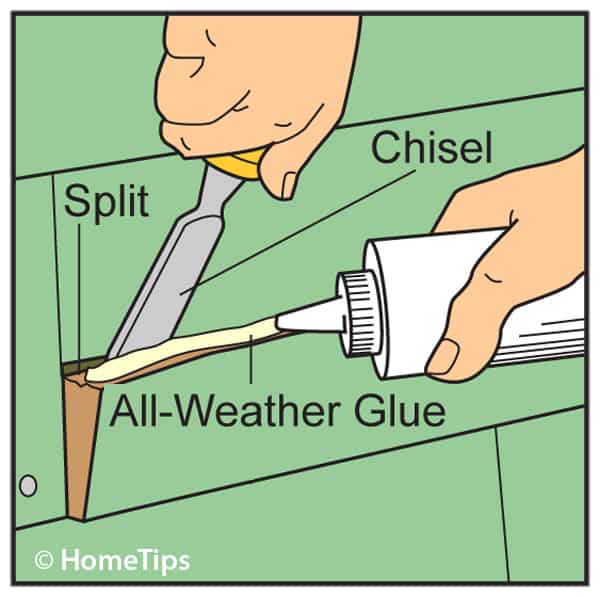
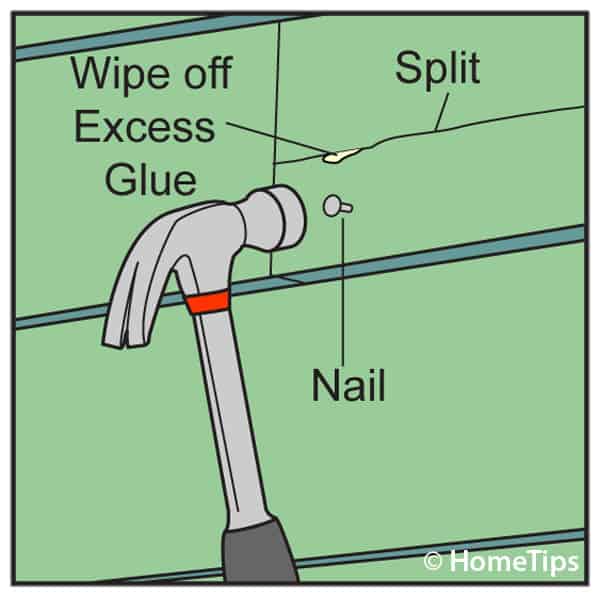
Split siding can generally be glued and nailed back in place, as shown in these drawings.

A section of damaged or decayed board may require complete replacement. Before you tackle this project, be sure you can find a replacement piece that matches. If you can’t find a perfect match, you may want to “steal” a piece from a less conspicuous part of the house and then replace that piece with a less-than-exact match.
The object is to cut the damaged piece, remove the nails that hold it in place, pry it out, repair any damage to the building paper, and replace the section.
Here’s how to do this:
- Pry out the nails holding the damaged piece, using a prybar or nail puller. Depending upon the type of siding, it may be helpful to drive a couple of small wooden shingles or wedges beneath the board to pull it outward.
- Use a square to mark a straight, square line for cutting across the board on each side of the damaged area.
- Set the blade depth on a circular saw so that it will cut almost—but not quite—through the siding. Carefully hold back the blade guard, and make a “plunge cut” just to the waste side of each cutting line. Be careful not to cut into the surrounding or lapped boards. If necessary, pry adjacent boards from the wall, and finish your saw cuts with a chisel and hammer.
- On tongue-and-groove siding (or other interlocking types) make another cut lengthwise across the damaged area so you can easily split the piece in half.
- Repair any cuts or tears in the building paper beneath the siding by spreading roofing cement over them with a putty knife.
- Cut a replacement piece to fit exactly. When replacing a piece of tongue-and-groove siding, cut the back side of the groove edge off. Fit the replacement piece into place, and nail it to wall studs with 8d galvanized finishing nails. Set the nailheads and fill the nail holes.
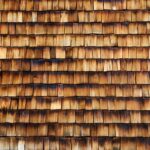
Replacing Wood Siding Shingles
If your home has wood shingle siding, your best option is to replace shingles rather than trying to repair them unless it’s just a matter of nailing down a warped or loose shingle.
Here’s how to replace a wood shingle:
- Pull out the broken pieces. Wear gloves for this, to protect your hands. If necessary, use a chisel or flat pry bar to break up the shingleso you can pull out the pieces easily.
- Pry out the nails that held the shingle in place (these are located under the next course up the wall). The easiest tool for doing this is a flat pry bar, but sometimes it’s easier to cut the nails off with a hacksaw blade. Be careful not to cut building paper underneath the shingle.
- Cut a replacement shingle to the proper width. When you size it, allow about 1/4 inch of clearance between this shingle and its two neighbors to allow for expansion.
- Place the replacement shingle in position, leaving its butt about 3/8 inch below the butt line of the adjacent shingles; nail it with two shingle nails, spaced about 1 inch in from the sides and just beneath the butts of the shingles above. Once you are done nailing, drive the shingle upward the last 3/8 inch to hide the nailheads.
- To blend the shingle with the grayed tones of aged shingles, brush on a mixture of baking soda and water.