An expert how-to on installing horizontal vinyl sliding panels on your home. Includes adding additional courses, overlapping end joints, and handling openings and eaves.

This article is a continuation of the discussion that began with Step 1: How to Install Vinyl and Aluminum Siding, Step 2: How to Prepare Walls for Vinyl or Aluminum Siding and Step 3: How to Install Starter Strips, Corner Posts & Trim Strips.
Step 4: Installing Horizontal Siding
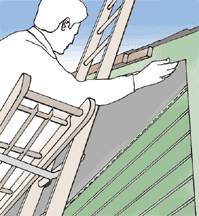
Now you’re ready to begin installing the actual siding panels. You’ll be working from the bottom up the wall, and if you’ve been following our sequence of articles, you’ll be starting with the first length of siding in place along the base of the wall.

The Second Course of Siding
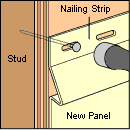
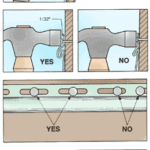
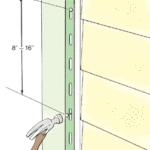
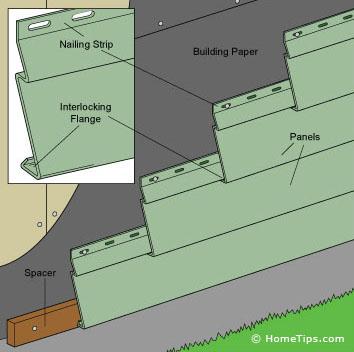
With a helper, interlock the flange of the second course panels along the top of the first panels, and nail them in place. Fasten panels with nails centered in the nailing slots, as discussed in the article How to Nail Vinyl Siding. Do not force the panels up or down when nailing them in position. Panels should not be under vertical tension or compression when nailed.
Check each course with a level and to insure proper alignment with windows, eaves, and adjacent walls. Make allowances for expansion and contraction by leaving approximately 1/4 inch at all corner posts and channels.
Overlap End Joints
Overlap vinyl panel ends in accordance with manufacturer’s recommendations (typically 1 inch). Because vinyl siding moves as the temperature changes, make certain that the vinyl panels can move freely in a lateral direction. At overlaps, allow for expansion by cutting 1 1/2 inches off the nailing flange at the end of the overlapping panel. When you come to a joint, slip the backer tabs with the flat side out behind the joint, which will make the panels more stable when they span a long distance.
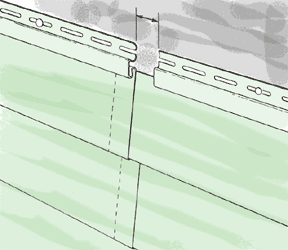
Plan overlaps where they’ll be the least visible, and stagger joints at least 2 feet from course to course, which will add to the siding’s stability.
Install Additional Courses of Siding
Install succeeding courses similarly. Stagger end laps so that one is not directly above the other, unless separated by three courses. Check every fifth or sixth course for alignment. Always overlap joints away from entrances and away from the point of greatest visibility.
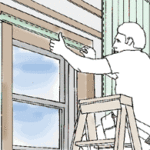
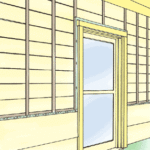
Installing Siding Around Openings
When you come to windows and doors, trim the panel with tin snips or a power saw, leaving 1/8 inch for expansion. Use gutter-seal adhesive to affix panels directly under windowsills and at soffits. If the space is narrow, simply slip the panel into the trim on one side and nail down the other side of the trim as succeeding panels are installed.
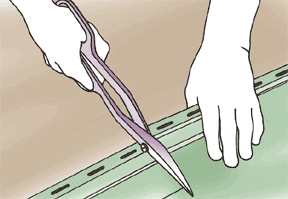
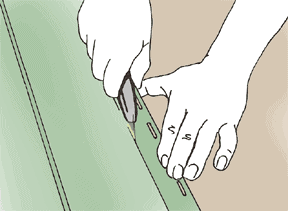
Under windows, mark the section to be cut out. Cut the sides with snips, and score lengthwise with a utility knife or scoring tool. Bend the section back and forth along the scored line to separate the piece from the main panel. The cut panel is ready for installation under a window. Use undersill trim along the horizontal cut edge or support with a 1-by-2 furring strip.
Finishing Siding at the Eaves
To figure out how wide the panel just under the eaves should be, measure from the eaves in several places to the bottom of the top panel’s top lock. Cut the panel to fit, subtracting 1/8 inch for expansion, and then slip it into the trim.
Push the siding into the finish or under-sill trim that has been nailed in place along the top of the wall. (One-by-2 furring strips may be needed to maintain the face of the panel at the desired angle.) The raised ears will catch and hold the siding firmly in place.
Along the gable rake, cut panels at the necessary angle so they fit into the J- or F-channels or into the quarter-round moldings. Furring strips may be needed to allow the last panel to sit at the proper angle when applying vinyl over old, existing siding.
Consult the manufacturer’s application instructions for exact cutting tolerances to ensure a proper fit for the top or finishing course of siding. Cut the siding panel so that it will cover the remaining open section.

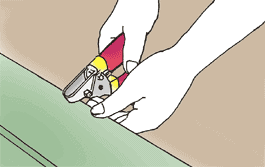
Using a snap-lock punch, punch the vinyl siding along the cut edge every 6 inches to 12 inches so that the raised ear or lug is on the outside face.