If you live in an area that’s prone to extremely high winds, hurricanes, or tropical storms, you should seriously consider protecting your home and family with hurricane shutters.


Most high-wind damage is caused by airborne debris crashing through windows and glass doors. Hurricane shutters, which are also called storm panels, provide an effective and relatively affordable way to cover window and door openings.
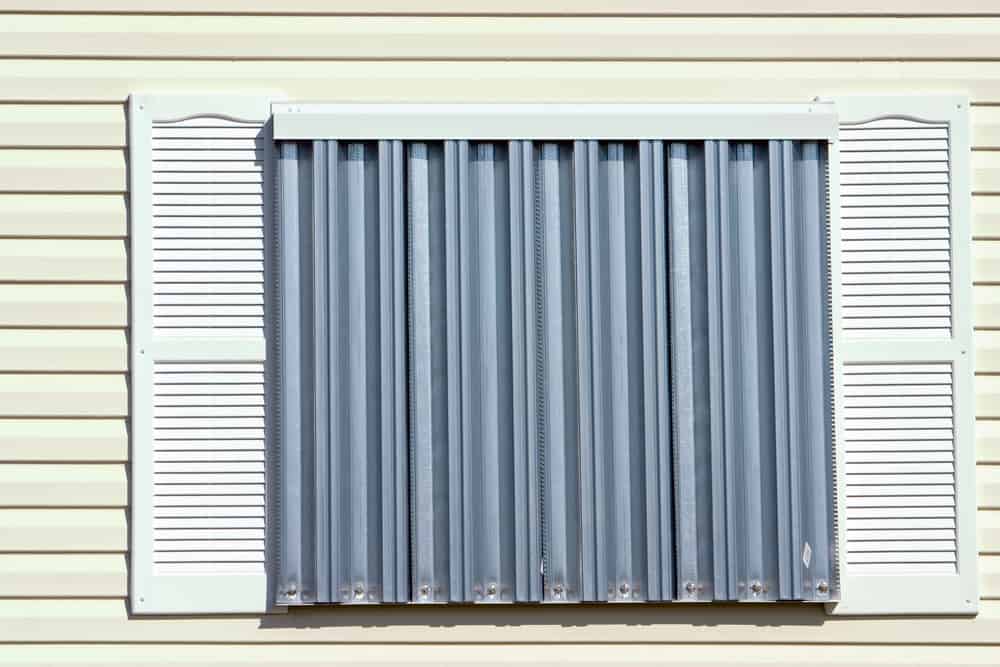
Here, we’ll discuss the key steps to installing corrugated aluminum shutters, which are quick and easy to install, remove, and store away. Aluminum shutters are also lightweight and incredibly strong. When properly installed, they’re capable of withstanding an impressive 1,000 pounds of force per square inch.
You can also find hurricane shutters made of steel and clear polycarbonate. Each type of shutter is installed slightly differently than the aluminum shutters discussed here. Therefore, it’s important to carefully read the manufacturer’s instructions to ensure the shutters are properly installed.
Before getting into the installation specifics, let’s take a brief look at how hurricane shutters are mounted to the house.
Hurricane Shutters Mounting Systems
A few different mounting systems are used to attach hurricane shutters to the house. The most popular type is known as a track system, which comprises two metal tracks: One track is mounted above the window or door, the other below it. The shutters fit within the two tracks and are secured to protruding bolts with wing nuts. (The aluminum shutters described below are installed with a track system.)

Track Systems
In a track system, the two tracks are permanently mounted to the house, and the shutters are installed as the storm approaches, and removed and stored away afterwards. There’s another version of the track system that has removable tracks that are taken down along with the shutters. The downside of a removable track system is that it takes much longer to install because you’ve got to install all the tracks first, and then put up the shutters.
Direct-Mount Systems
For a direct-mount system, there are no tracks; instead you simply bolt the hurricane shutters directly to the house wall. With this system, threaded inserts are permanently set into the wall and then a machine screw is driven into each insert. When it comes time to install the shutters, you remove the screws, place the shutter over the window or door, and thread the screws into the inserts.
Accordion Shutters
Finally, there are accordion shutters, which get permanently mounted to the house. When there’s a storm coming, all you need to do is pull the shutters closed and latch them. Once the storm passes, simply push the shutters back out of the way. While accordion shutters are the easiest by far to operate, they’re also several times more expensive than aluminum hurricane shutters. Plus, they require professional installation.
How to Install Corrugated Hurricane Shutters
Corrugated aluminum hurricane shutters can be installed by any experienced DIYer. Here’s how.
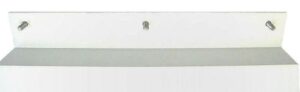
Start by installing the header track, which is often referred to as an H-track because, in profile, it resembles the capital letter H. Next, install the bottom track, which is known as a stick-stud angle because it has threaded bolts (studs) protruding from its surface.
Both tracks must be securely fastened to the house with stainless steel screws or bolts. Check with the shutter manufacturer for specific installation instructions for fastening to various house walls, including wood-framed, concrete block, or poured concrete. Be sure to wear leather work gloves when handling aluminum shutters; they have very sharp edges.
- Begin by holding the header track horizontally above the window, making sure its bottom edge is flush with the window opening.
- Drive in one screw near the center of the header, then check it for level before driving in the remaining screws.
- Run a bead of silicone caulk along the top of the header to seal out rain.
- Slip a hurricane shutter into the header and press the shutter tight to the wall. Mark where the bottom end of the shutter contacts the wall below the window.
- Measure down ½ inch from the mark and draw a level line onto the wall. Hold the bottom track flush with the level line and screw it to the wall. Most bottom tracks have the bolts already in place. If your track does not, slide the bolts into the provided channel, or pass them through the pre-drilled holes.
- Now, with both tracks in place, you can install the hurricane shutters. Slip the upper end of the first shutter into the header.
- Press the bottom of the panel against the house wall. Be certain the bolts protrude through the keyhole slots along the bottom of the shutter.
- Place keyhole washers onto the bolts, if required by the manufacturer, then thread a wing nut onto each bolt. (A wing-nut driver in a cordless drill makes this job go much faster.)
- Slip the second shutter into place, making sure it overlaps the first one. Again, secure the bottom of the shutter with wing nuts. Repeat until all panels are securely held within the two tracks.
That’s all there is to it. It usually takes about five minutes to install aluminum hurricane shutters on an average-size window and less than 10 minutes to protect a sliding patio door. Once you’re sure the storm has passed, you can remove the shutters just as quickly by reversing the installation steps.
The Cost of Hurricane Shutters
By now, I’m sure you’re curious to find out how much aluminum hurricane shutters cost. Prices depend on the size of the shutter, but they also vary from one region of the country to another. However, here’s a ballpark idea of costs:
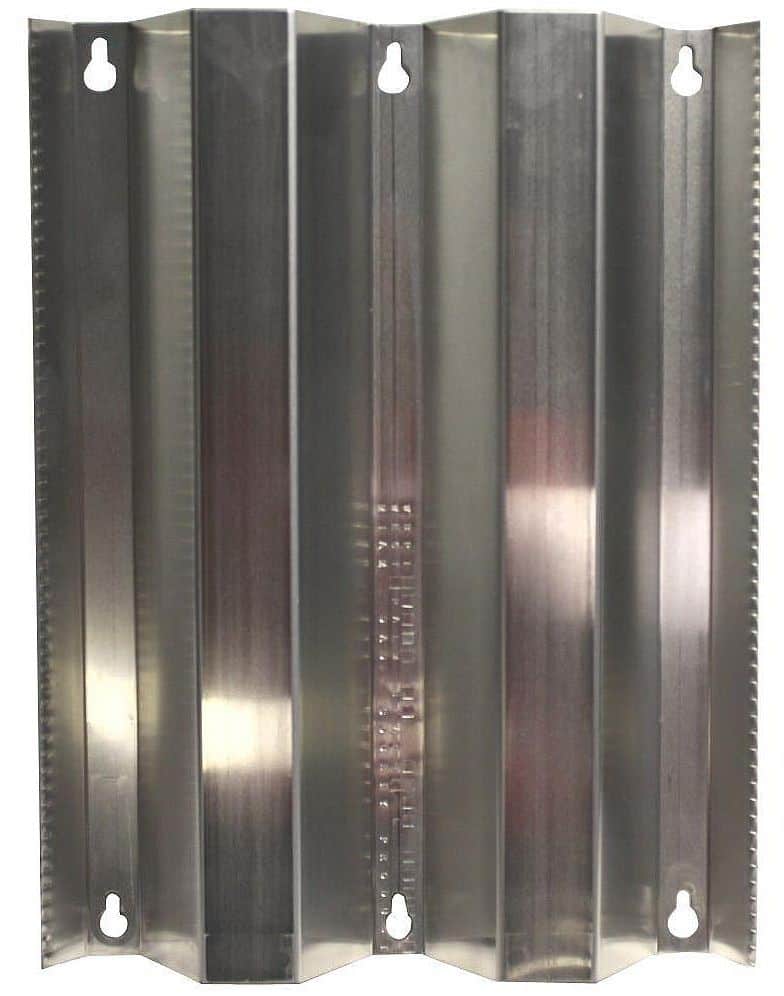
Corrugated aluminum shutters are typically 15 inches wide, and commonly available in four different heights: 44 ($25), 68 ($34), 86 ($42), and 104 inches ($55).
Expect to pay about $35 for a 146-inch-long aluminum header track, and $56 for the same-length stick-stud angle bottom track. Both tracks can be custom-cut to length.
Depending on how many windows and doors you need to protect, the final cost of hurricane shutters can be significant. However, you should be able to recoup some of the expense through lower homeowner’s insurance premiums; most insurance companies offer considerable discounts if you have hurricane shutters.
Final Advice
Here are two final pieces of advice for your consideration:
1) Practice installing all of your hurricane shutters, and time how long it takes to get them out of storage and hang them up so you have a realistic idea of the lead time you need if a major storm approaches.
2) Be sure your hurricane shutters are easily accessible, and be prepared to act quickly. When a storm is approaching, jump into action, installing the shutters as soon as possible. Hurricane shutters will provide very little protection if they’re buried deep inside your garage.
Joseph Truini is an author and home improvement expert who writes for The Home Depot. He provides advice on everything from picking the right shutters to installing a kitchen island. To view a variety of shutter options, click here.