Expert step-by-step instructions for replacing or installing a dishwasher

For the average do-it-yourselfer, installing a new dishwasher is an uncomplicated process that takes just a few hours and some basic tools. For information on purchasing a new dishwasher, see How to Buy the Best Dishwasher, a free, unbiased HomeTips buying guide.

If you are replacing an existing dishwasher, there won’t be any mystery about the best place to put the new one. If you’re installing a dishwasher where there wasn’t one before, the only consideration for placement is that the appliance’s door be able to open fully without knocking into anything.
This video from This Old House does a great job of showing you how to install a new dishwasher where there wasn’t one before.
If you are simply replacing an existing dishwasher with a new one, skip down the page a little further.
Before starting any work, turn off the power and place a 3-by-3-foot piece of plywood on the floor to prevent scratching the floor.
Dishwashers come with complete instructions for installation; make sure you follow them precisely. The guidelines provided here will give you an idea of the basic parameters of the job.
Plumbing & Electrical Hookups
You will need a GFCI-protected, 120-volt electrical receptacle to plug the machine into. The most convenient location is against the back wall of the cabinet below the sink.
The dishwasher must connect to the hot water supply of the sink. The hookup is generally via a 3/8-diameter copper tube attached by compression to a dual-outlet shutoff valve under the sink. More about this in the step-by-step information below.
The dishwasher’s drain water will exit through a flexible hose that runs from the waste outlet of the dishwasher to a tee above the sink’s drain trap or to the dishwasher inlet of the garbage disposal. To connect to the garbage disposal, you must first knock out the plug inside the dishwasher nipple.
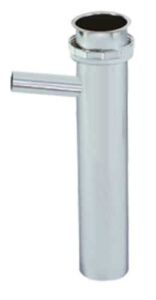
If you are connecting to the drain trap of the sink, simply remove the sink drain’s tailpiece and exchange it for a dishwasher tailpiece. Then plan to connect the dishwasher’s drain hose to it, as discussed below.
Dishwasher Air Gap—What It Does
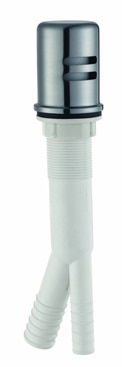
Many local building codes require a dishwasher to connect to an air gap before the connection to a garbage disposer so wastewater doesn’t flow back into the appliance. If your local codes require an air gap, you’ll need to buy it separately. Mount it on top of the sink. Connect one flexible hose to the drain of the dishwasher, and connect the other flexible hose to the trap of the sink or to the disposer’s dishwasher inlet. If your local codes do not require an air gap, you can shape the drain hose of the dishwasher into a high arc instead.
This video shows what an air gap looks like and where it goes, discusses whether or not you need one, and shows how to clear the air gap if it gets clogged.
Step-by-Step Dishwasher Installation
If you are replacing an old dishwasher with a new one, you will need to take the old one out first. The good news is that the plumbing and electrical hookups are already there, making the job much easier. This two-part video shows the process of replacing an old dishwasher. Part 1 covers taking out the old one. It shows how to make sure the power is off before you start, and where to look for attachment screws. Part 2 shows you how to install the replacement.
Note: Unplug the dishwasher or turn off the circuit breaker to disconnect the power before you do anything else. Next, shut off the water supply valve, which is typically located under the sink. If you can’t find a shutoff valve, you will have to turn off the main house water shutoff and then open a faucet to drain the pipes.
If necessary for running hoses and the power cord through the base cabinet, use a power drill to bore holes at the back lower corner.
 HomeTips Pro Tip: If the dishwasher does not have a dedicated shutoff valve, this would be a good time to install a special dual-outlet shutoff like the one shown in Step 1.
1 Install a shutoff valve to serve hot water to the dishwasher. Start by shutting off the house’s water supply. Next, disconnect the sink’s hot-water supply tube from the existing under-sink hot-water valve. In most cases, you do this turning the nut (that locks the tube in place) counterclockwise with a wrench.
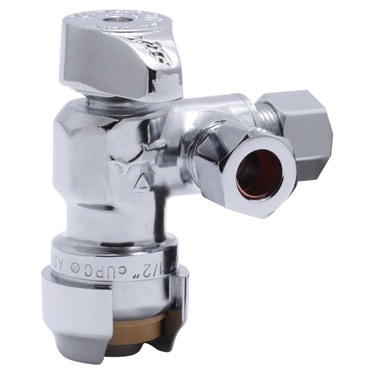
Have a bowl or bucket handy to catch the water that will be inside the tube. Then, remove the shutoff valve from the supply nipple with a wrench—again, turn it counterclockwise with a wrench if it’s on a threaded nipple. Wind pipe-wrap tape clockwise around the nipple’s threads. Then screw a new dual-outlet shutoff valve onto it and tighten.
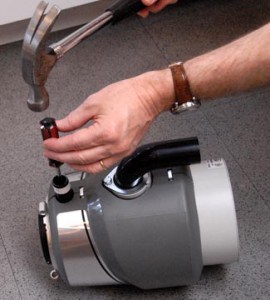
2 Install the dishwasher’s air gap. This will require a properly sized unused hole in the sink top. Many sinks have a plug that you can punch-out with a hammer. If you need to drill a new hole, please refer to the information on this page. Remove the cover and locking nut from the air gap and insert the air gap through the hole from below. Tighten the locking nut, using slip joint pliers if necessary, and push the cover back onto the device.
Note: Some local codes allow looping the dishwasher’s drain hose up under the counter and attaching it to the underside of the counter or the wall instead of installing an air gap. Please see the air-gap video earlier in this article for more about this.
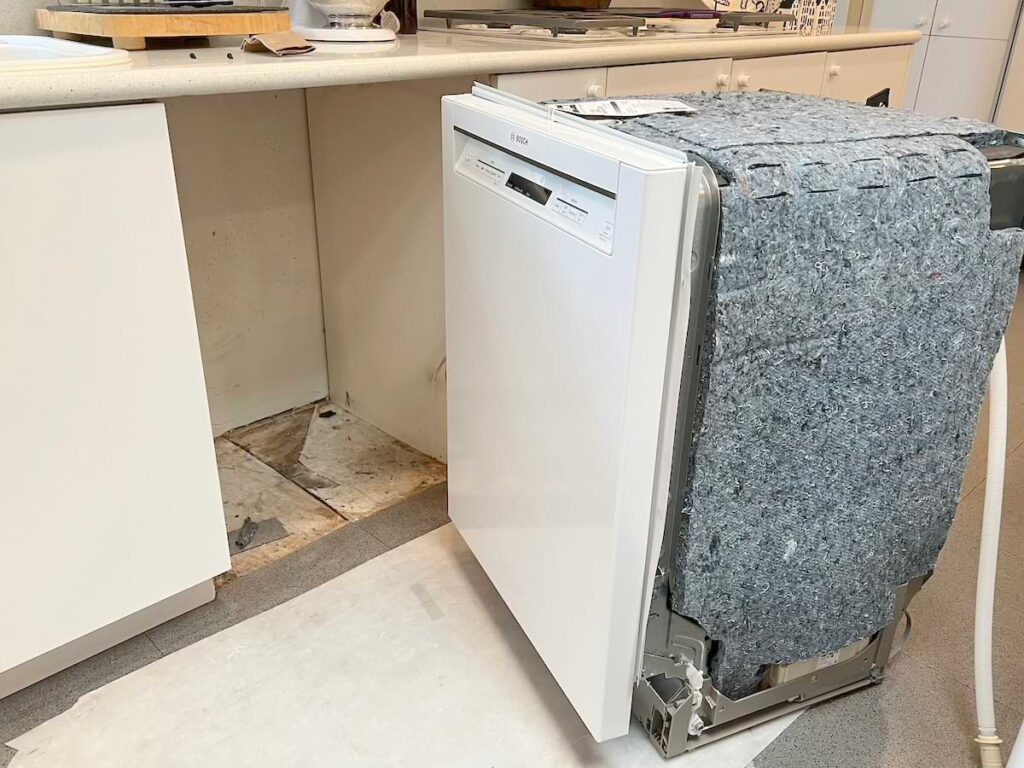
3 Position the dishwasher near its opening, and then push the hose, supply tube, and power cord through holes drilled in the back corner of the sink base cabinet. As you walk the dishwasher into place, be careful not to pinch or tangle the cord or hoses.
4 Reconnect the sink’s supply tube to the dual-outlet valve, and connect the flexible supply tube to the valve’s second outlet and the dishwasher’s inlet. Then tighten with an adjustable wrench until snug.
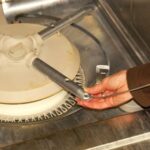
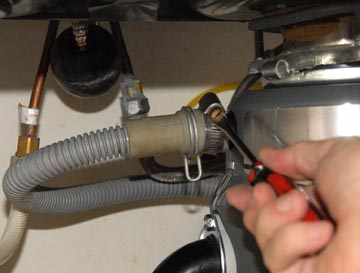
5 Slip one hose clamp over each end of the short drain hose that will run from the garbage disposer (see photo) or the sink drain’s tail piece to the large outlet on the air gap. Cinch the clamps until tight. Then do the same with the longer drain hose, running it from the smaller outlet on the air gap to the drain fitting at the base of the dishwasher.
After installation, it is important to adjust the appliance’s front feet to level and align it with the cabinets and countertop. Screw the unit to the underside of the counter. Turn the water supply back on and look for leaks.
Plug in the dishwasher. If installation requires any hard-wiring, refer to the HomeTips section on Home Electrical Wiring.