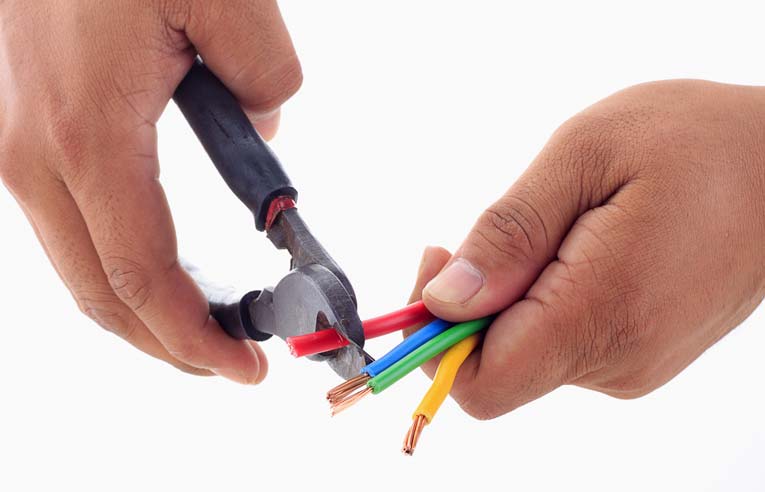
Cutting electrical wires, stripping the insulation from their ends, and joining wires together are essential techniques when you’re doing electrical work. This expert guide shows you the tools and techniques that make this an easy job.


Most electrical jobs such as installing light switches or electrical outlets involve cutting electrical wires and stripping the insulation from their ends so they can be joined together.
Never work on active electrical wiring without turning off the electrical power first! See How to Turn Off Your Home’s Electricity.
How to Cut & Strip Electrical Wire
A wide variety of tools is available for cutting wires, including lineman’s pliers, diagonals, and the inner cutter of a wire strippers.

Diagonals come in many sizes. They’re handy for cutting relatively small wires.
Needle-nose pliers are necessary for reaching into difficult areas, twisting wires, and snipping off small wires.
Lineman’s pliers work well for heavy duty cutting such as large wires and non-metallic cable.
Wire strippers are made in a variety of styles, as you can see on this Amazon page.
But which ones are the right ones to choose?
This video compares several wire strippers and highlights the best features and brands.
This video compares four different types of wire strippers and recommends the best one for various wiring jobs.
To easily strip the insulation off of small solid-core wires from sizes #18 to #10, use wire strippers or the graduated wire stripper jaws on a multipurpose tool.
To strip larger wires, from #8 to #2/0, use a pocket knife to take off the insulation as if you were sharpening a pencil, away from your body. The length of wire you’ll need to strip varies depending on the job.
Be careful not to nick the wire when you’re stripping off its insulation. A nicked wire will break easily when bent. If you do nick a wire, snip it where the nick is and begin again.
1 Insert the wire into the proper slot for the size wire you are stripping (or adjust the screw on the stripper for the size of the wire). With the wire at a slight angle, press the handles of the stripper together.
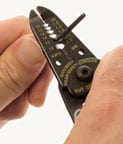
2 Gently rock the stripper blades back and forth to cut through the insulation but not into the wire. When the insulation has been cut through, pull it off in one fluid, fast motion.
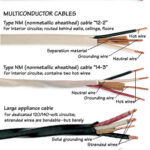
How to Cut Romex® Nonmetallic Cable
Cutting Romex® or similar nonmetallic sheathed electrical cables doesn’t require much instruction—just use lineman’s pliers or heavy-duty diagonal cutters to snip snip the cable in half. Of course, the larger the cable, the more pressure you’ll need to apply.
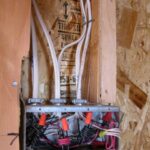
Before you can strip the insulation from the ends of the wire conductors inside the cable, you’ll need to remove the cable’s outer plastic-like sheath. Opening up nonmetallic cable to expose the individual conductors inside is called “ripping.”
To rip a flat (not round) cable, you can use either a utility knife or a cable ripper, as shown here.
To use a cable ripper, you slide it over the cable, squeeze the body so that the cutter penetrates the outer sheath, and drag it off toward the end of the wire.
Use a utility knife to rip round cable. Carefully follow the wire’s contours to avoid cutting or nicking the wires inside.
When ripping either kind of cable with a utility knife, always work on a flat horizontal or vertical surface and cut away from your body, never toward it.
1 Slide a cable ripper onto a flat cable. Press the handles together and pull to score the sheath.
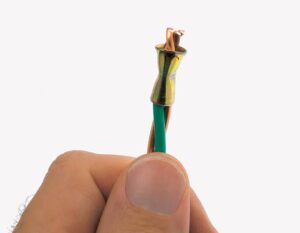
2 Bend the cable until the scoring cracks, and then peel away the outer sheath and all separation materials to expose the wires.
3 With diagonal-cutting pliers, snip off the peeled sheath and other separation materials, leaving just the wires. To make connections, you’ll need to strip the insulation from the ends of the insulated wires as discussed above.
Joining Electrical Wires
Joining the ends of wires together is easy if you have the right tools and a basic understanding of this simple process.
When working on an electrical project, taking care that all the connections are made well and will last isn’t just about getting the job done right—it’s also a matter of safety. Poorly joined, or spliced, wires can lead to electrical shorts and become a fire hazard.
Two kinds of connectors splice wires together safely and strongly—wire nuts and compression sleeves. Which connector you use will depend on your project and your local building codes.
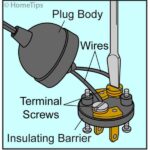
How to Join Wires with Wire Nuts
Wire nuts are thimble-shaped connectors made from a hard plastic. They twist over the ends of joined wires to strengthen the connection and conceal the bare ends of the wires.
Because wire comes in many different sizes, or gauges, finding the right-size wire nut for your project is crucial.
Wire nuts are color-coded to distinguish their sizes, which range from the smallest, gray-colored #22 American Wire Gauge (AWG) to the largest, red-colored #10 AWG. Using a wire gauge to measure the wire you will be splicing will help you choose the right wire nut for the job—the container of wire nuts should list the number and size of wires it’s made to connect.
Once you have the right-size wire nut for the project, making a connection is easy:
1 Strip about 1 inch of insulation from the ends of the wires being spliced together, using a wire stripper as discussed above.
2 Twist the wire ends together clockwise, 1 to 1 1/2 twists. For large wires, it helps to pinch together the bare ends with lineman’s pliers, and then twist.
3 Evenly trim ¼ to ½ inch off of the ends of the twisted wires.
4 Screw the wire nut clockwise onto the twisted wire ends until it is tight enough not to come loose when tugged. Make sure no bare wires are exposed.
5 To secure the wire nut, many electricians also wrap the wire nut and wires clockwise with electrician’s tape. This is a good practice.
How to Join Wires with Compression Sleeves
Compression sleeves provide a more permanent bond than wire nuts. For this reason, some local building codes require their use. Shaped like bullet casings with the ends cut off, some compression sleeves have the added feature of being insulated.
Though putting on compression sleeves is a little more complicated than putting on wire nuts, they are perfect for projects where durability is paramount.
To splice wires to receive a compression sleeve:
1 Strip the insulation from the ends of the wires, exposing about 1 inch of the metal conductor, and twist the wires together about one and a half times.
2 Cut about 1/2 inch off of the ends of the wires.
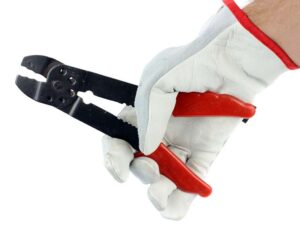
3 Slide the compression sleeve onto the bare wire ends, and then crimp the sleeve with a multipurpose tool or the end of a wire cutter that’s made for crimping rather than cutting. Remember that the bare metal sleeve and the bare wires will conduct electricity! At the very least, wrap this connection with electrical tape. The addition of an insulating cap makes the connection safe and secure.
Find an Electrical Pro Near You
![]()
![]()