Deck Lighting Ideas and Tips: Illuminating Your Outdoor Oasis
How to light your deck for enjoyable evenings with family and friends. Inspiring deck lighting ideas! In This Article: Types

5 Common Fire Pit Mistakes to Avoid: A Homeowner’s Guide
Expert advice on how to plan and use a fire pit so you avoid common fire pit mistakes and get
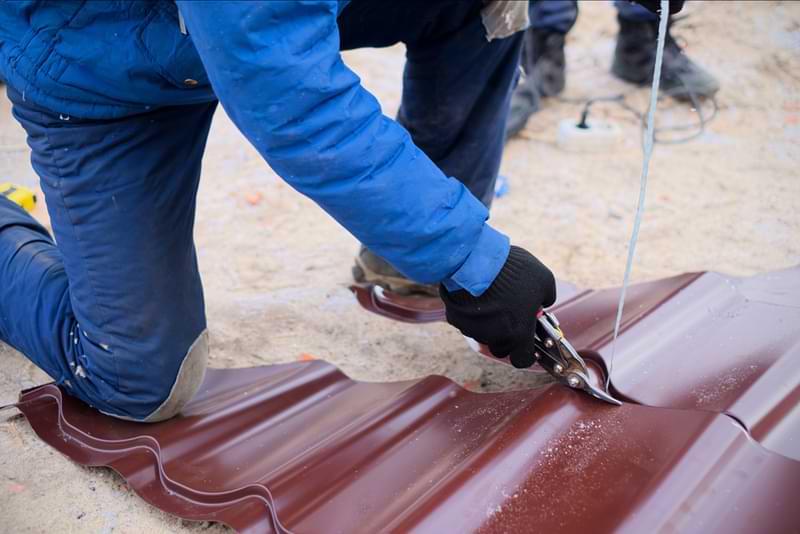
How to Clean and Repair Metal Roofing
Expert advice on how to clean and repair metal roofing, including DIY tips on how to fix rust and patch

Deck Lighting Ideas and Tips: Illuminating Your Outdoor Oasis
How to light your deck for enjoyable evenings with family and friends. Inspiring deck lighting ideas! In This Article: Types of Outdoor Deck Lighting Deck

5 Common Fire Pit Mistakes to Avoid: A Homeowner’s Guide
Expert advice on how to plan and use a fire pit so you avoid common fire pit mistakes and get the most from it. In

How to Clean and Repair Metal Roofing
Expert advice on how to clean and repair metal roofing, including DIY tips on how to fix rust and patch leaks on metal roofs, and

Why We’re Experts
 Don Vandervort writes or edits every article at HomeTips. Don has:

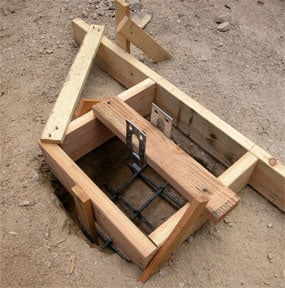
How to Pour Concrete Footings & Piers
How to pour concrete footings and piers, with step-by-step instructions for building a form and ready-made concrete pier options. In This Article: Fiber-Tube Forms Ready-Made
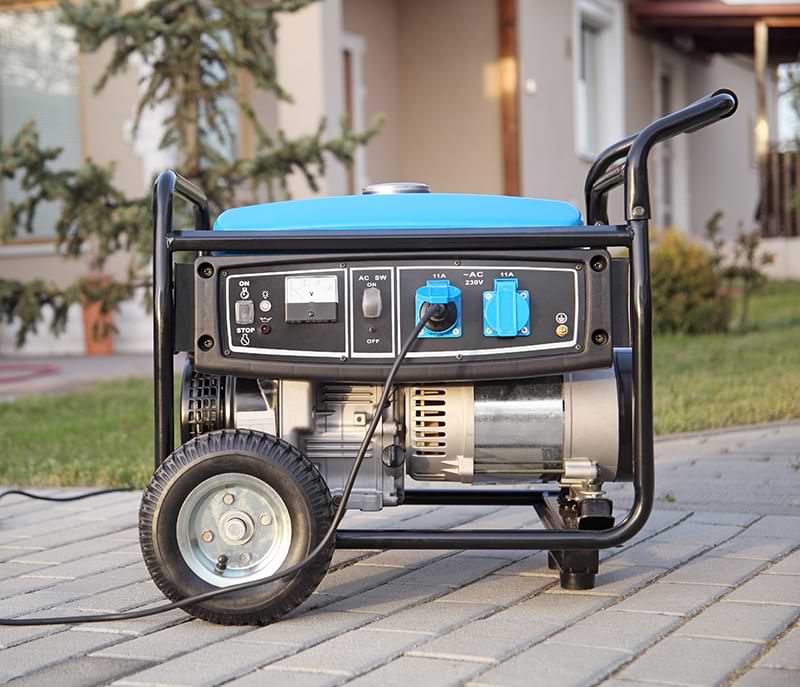
A Portable Generator Can Save You When the Power Goes Out
Expert advice on emergency portable generators, including how to buy, set up and run them, and generator features, sizes, and necessary equipment. In This Article:
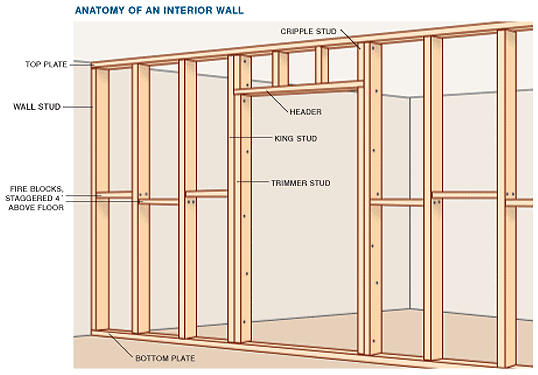
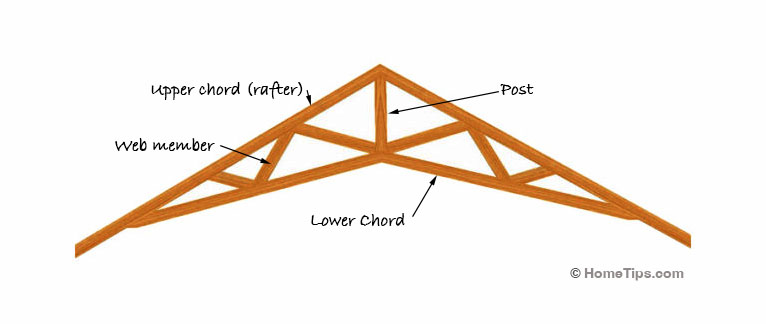
What Is a King Stud?
Want a definition of “king studs”? This article defines king studs, which are used for framing walls. It includes helpful diagrams that show where king
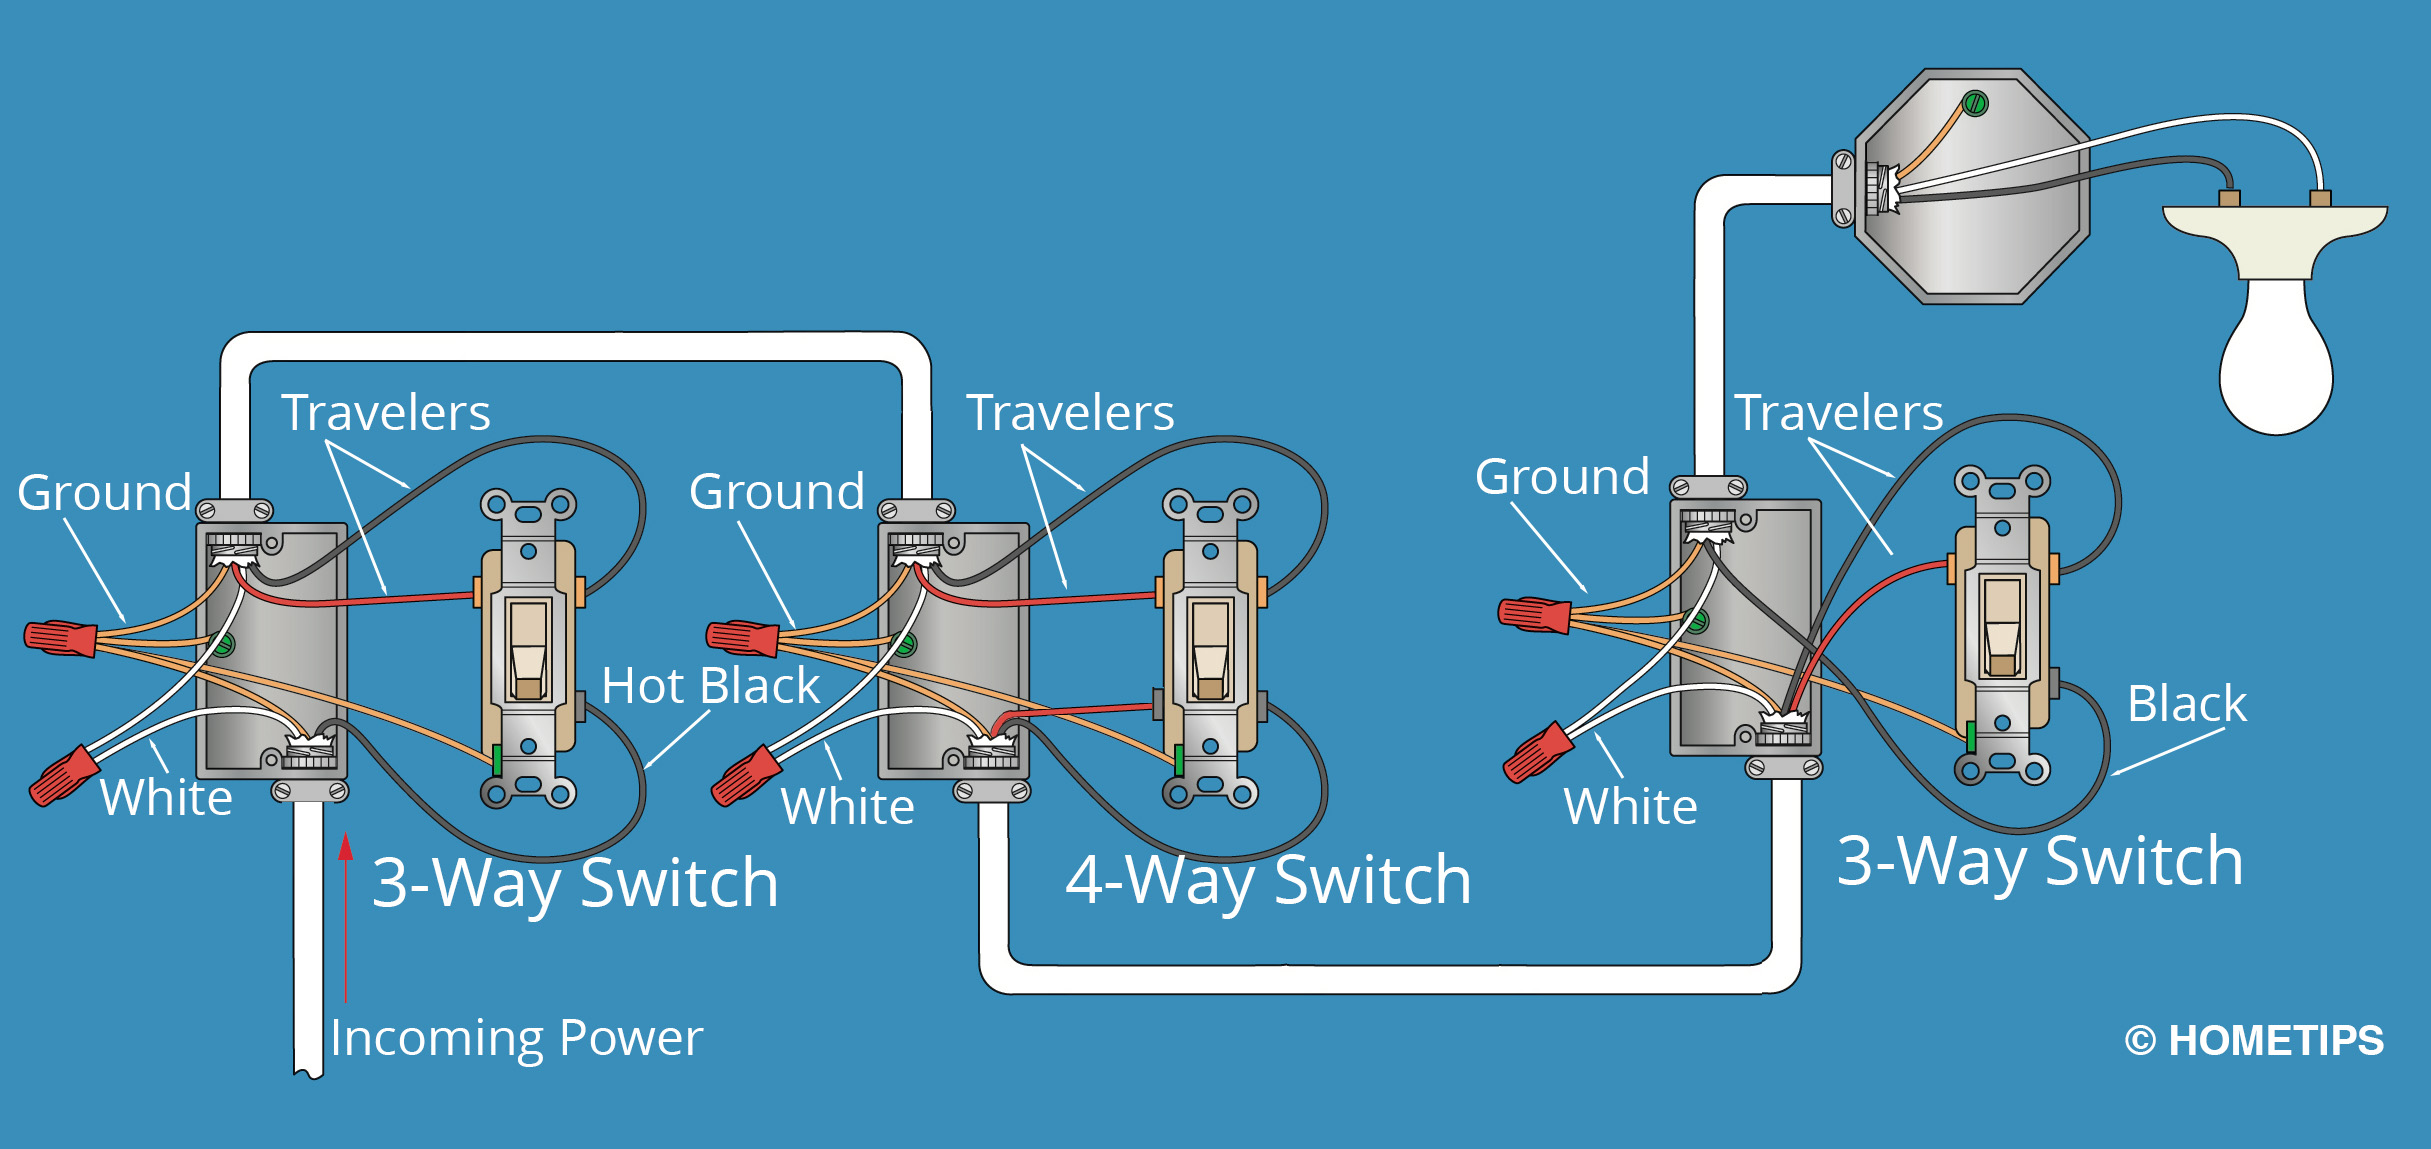
Four-Way Switch Wiring | How to Wire a 4-Way Switch
This article shows you how to wire a four-way switch that is combined with a pair of 3-way switches to allow controlling the same lights
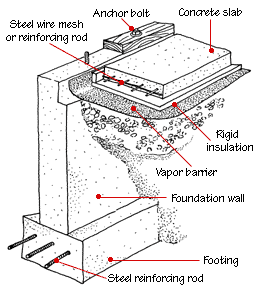
House Foundation Types and Diagrams
How basic foundations are built, including slabs, perimeter foundations, concrete blocks, and piers A house needs a foundation to shoulder its considerable weight, provide a
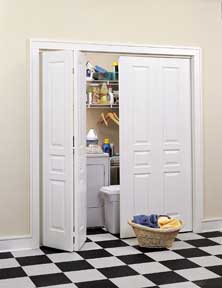
How to Build a Closet
Build a closet yourself, following these illustrated step-by-step techniques, including wall framing, paneling, and finishing. In This Article: Planning to Build Closet Walls Getting Started
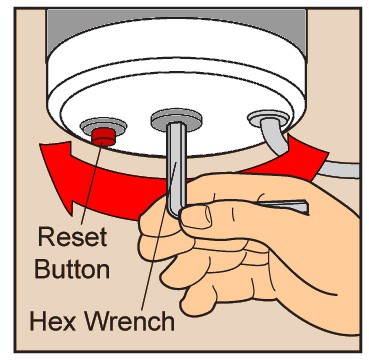
How to Fix a Garbage Disposal – DIY Repair
How to repair a garbage disposal that’s jammed, clogged, leaking, or not draining. Complete illustrated step-by-step garbage disposal troubleshooting and repair guide. In This Article:
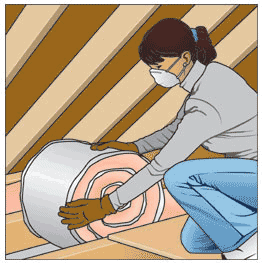
How to Insulate an Attic
Whether your attic is finished or unfinished, this expert DIY guide will show you how to insulate it. Includes where insulation goes, the need for

Pros & Cons of Metal Roofing
Is metal roofing right for your home? This expert guide reveals the benefits and drawbacks of metal roofing and compares metal roofing to other roofing
House Foundation Types and Diagrams
How basic foundations are built, including slabs, perimeter foundations, concrete blocks, and piers A house needs a foundation to shoulder its considerable weight, provide a
How to Build a Closet
Build a closet yourself, following these illustrated step-by-step techniques, including wall framing, paneling, and finishing. In This Article: Planning to Build Closet Walls Getting Started

How to Fix a Garbage Disposal – DIY Repair
How to repair a garbage disposal that’s jammed, clogged, leaking, or not draining. Complete illustrated step-by-step garbage disposal troubleshooting and repair guide. In This Article:
How to Insulate an Attic
Whether your attic is finished or unfinished, this expert DIY guide will show you how to insulate it. Includes where insulation goes, the need for

Pros & Cons of Metal Roofing
Is metal roofing right for your home? This expert guide reveals the benefits and drawbacks of metal roofing and compares metal roofing to other roofing


Design Secrets for Planning a Basement Bathroom
Inspired basement bathroom ideas and expert planning tips for creating stylish, smart, and functional basement bathrooms Facing today’s high real estate costs, many homeowners are

Expert Hacks for Remodeling Your Home Fast, Cheap, and Smart
Smart, expert hacks, tips, and strategies for controlling your budget and streamlining your home remodeling project. In This Article: Remodeling Hack #1: Reconfigure Existing Space
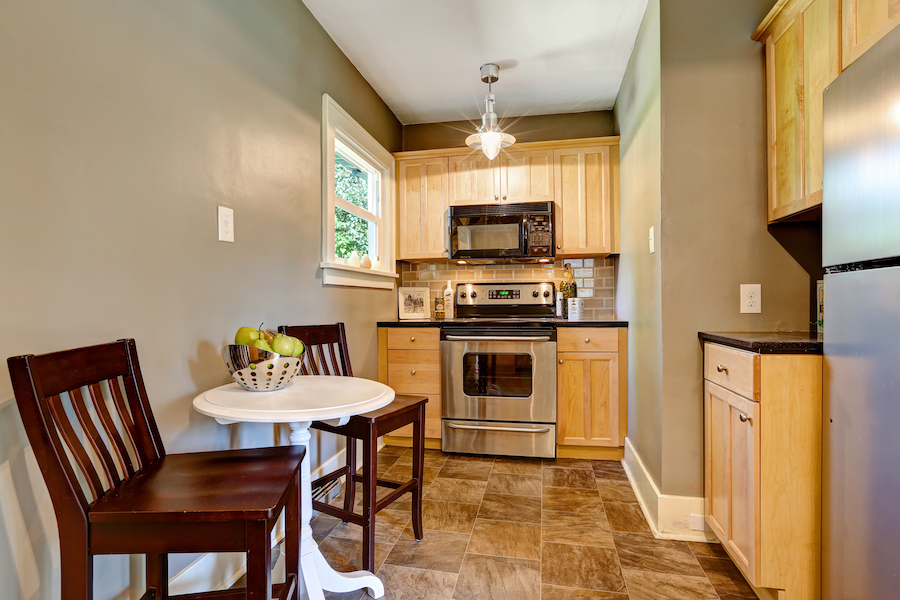
Basement Kitchen Ideas: Solutions for Design Issues
Expert basement kitchen design solutions for solving common issues with basement kitchens, such as low ceilings, poor lighting, and dampness. In This Article: How to
Four-Way Switch Wiring | How to Wire a 4-Way Switch
This article shows you how to wire a four-way switch that is combined with a pair of 3-way switches to allow controlling the same lights