This guide will teach you how to measure and cut wood posts, a necessary skill for many DIY projects such as patio overheads and gazebos. Learn how to measure wood posts, cut wood posts using a saw, and lift beams onto them.

Begin by cutting the posts 6 to 12 inches longer than the finish length. Have a helper hold the first post plumb on its anchor. If you are using pressure-treated posts, make sure to place the uncut end into the post base—but only if it is square. Use a combination square to check; if the post isn’t square, cut just enough off the bottom to make it square. Coat the cut surface with a water-repellent preservative before setting the post in place.
Posts can be quite heavy, so you’ll probably need a helper when it comes time to position them. Before moving the first post into position, drive stakes into the ground and nail a brace made from a 1 by 3 or 1 by 4 to each stake (use only one nail so the brace can pivot). Position the stakes far enough away from the end of the post so the braces can reach midway up the post when they are at a 45-degree angle, as shown above right.

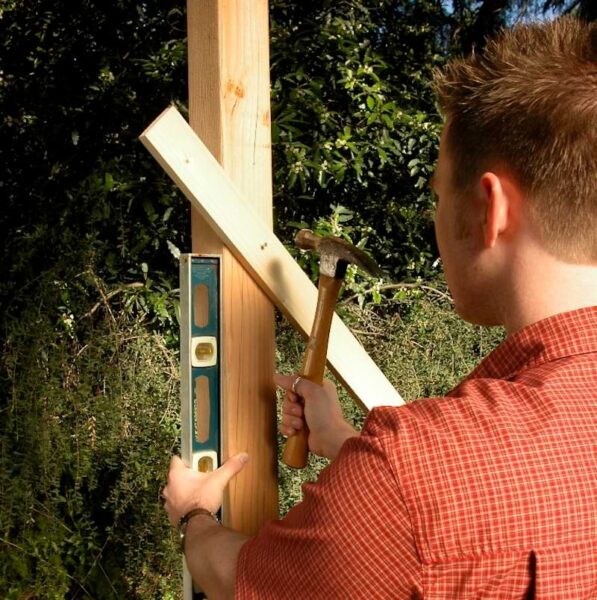
Seat the post squarely in the anchor and check for plumb using a carpenter’s level on adjacent sides. When the post is plumb, temporarily nail the braces to it.
Use a line level, laser level, or water level to mark the post at the proper height for the bottom of the rafters, according to your plans. If the structure is house-attached, this height is usually level with the bottom of the ledger.
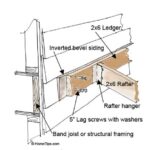
But pay particular attention to your design here, because rafter/ledger/beam connections vary. For example, if you are using a ledger that is wider than the rafters, you’ll need to measure down from the ledger’s top to determine where the bottom of the rafters will fall.
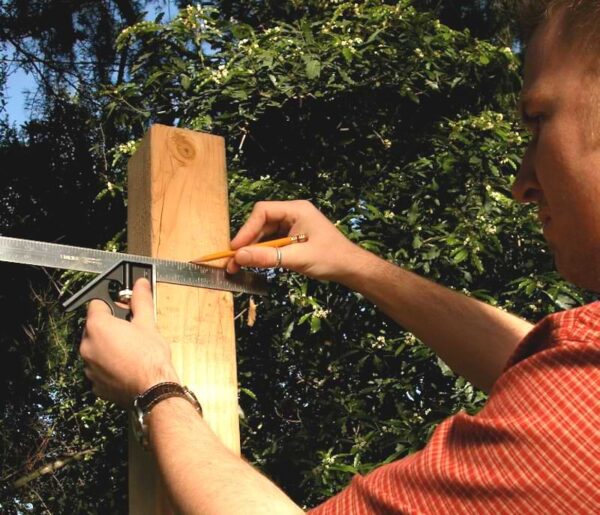
From that mark, subtract the actual thickness (or, in this case, the “height”) of any beam that will sit between the post and rafters. Also subtract any necessary drop for roof pitch and, for a sloped rafter, the small notch in the rafter’s underside where it rests on the beam. Make a new mark and, using a combination square, continue it around the post’s perimeter. This is your cutting line. Repeat for the remaining posts, and label each one so you know where to return it after cutting.
Cutting Posts
Set the blade of a circular saw to cut as deep as possible. For a 4-by-4 post, you will need to cut the post twice, on opposite sides. For a 6-by-6 post, cut along the line on all four sides and then finish the cut with a reciprocating saw or handsaw.
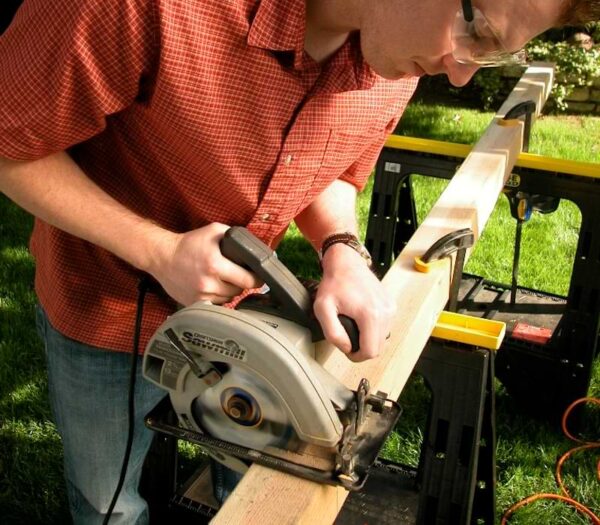
Be sure to wear safety glasses, gloves, and a dust mask. Before permanently erecting the posts, seal the cut ends with a preservative and consider finishing them. If your design calls for metal post-and-beam connectors, attach them to the tops of the posts before raising the posts.
Lifting & Seating Beams
Hoisting a large beam atop a post over your head demands considerable strength; always get help for this stage of construction.
After cutting the beam to the proper length, drag it into position next to the posts and slip a short length of 4 by 4 under one end. With a helper, raise that end of the beam and maneuver it into the post cap.
Partially drive in one nail to secure the beam before you lift the other end. Raise the other end using the same technique. Then finish fastening the beam to the post caps.
Though metal post-and-beam connectors are strong and easy to use, you can secure this connection using other methods. For example, you can nail a pair of wooden cleats to each post’s top. Or, for a design that utilizes paired 2-bys to provide the support a single beam would otherwise afford, you can mount pressure-treated plywood cleats to the underside of the pair and screw them to the post tops.
NEXT SEE: