Connecting the plumbing for a new bathroom sink isn’t as daunting as it might sound. In fact, this can be a relatively fast and satisfying DIY project if you have the right tools and a little know-how.

Does the type of sink matter? In most cases, no. The drain and water-supply connections are generally installed using the same techniques, regardless of the sink design. In this article, we’re going to assume that you’ve already placed and installed the sink and just need to hook-up the plumbing. For more about installation, see these articles:
So, grab the following tools and supplies and get ready to dive into the step-by-step bathroom sink installation process.


Tools and Supplies
You will need the following tools and supplies:
- Slip-joint (ChannelLock) pliers. These are the tool of choice for most gripping and tightening of pipes and nuts.


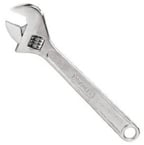
Slip-joint Pliers - Adjustable wrench. This comes in handy for securing the nuts that connect the water supply lines.

Adjustable Wrench - Bucket and rags. Keep a bucket and some rags handy to catch any water spills.
- Hacksaw or tubing cutter. You’ll want a cutting tool like this if you need to modify or cut any pipes or tubing.
- Pipe-thread tape (also known by the trade name Teflon® tape) is used to create a watertight seal on threaded pipe connections.
- Plumber’s putty to provide a seal between the drain collar and sink hole.
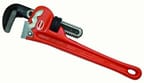
- Pipe wrench (optional): A pipe wrench can be helpful for working with larger and more stubborn nuts or pipe fittings.

Pipe Wrench - P-trap drain assembly
- Water-supply tubes to connect your faucet to the shut-off valves. Be sure to buy the right sizes!
Step-by-Step How-to
Here’s how to hook-up your new sink to the plumbing:
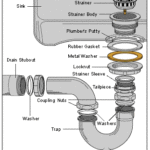
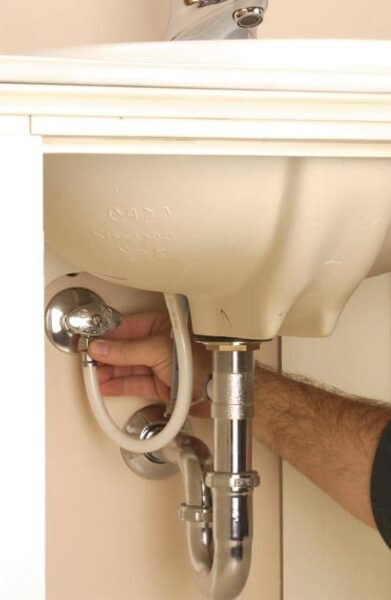
1. Attach the drain pipe at the wall. Start by hand-tightening the drain arm to the drain stub-out at the wall, using a washer and coupling nut. This connection provides a secure entry point for the drain system and ensures a solid foundation for the rest of the setup.
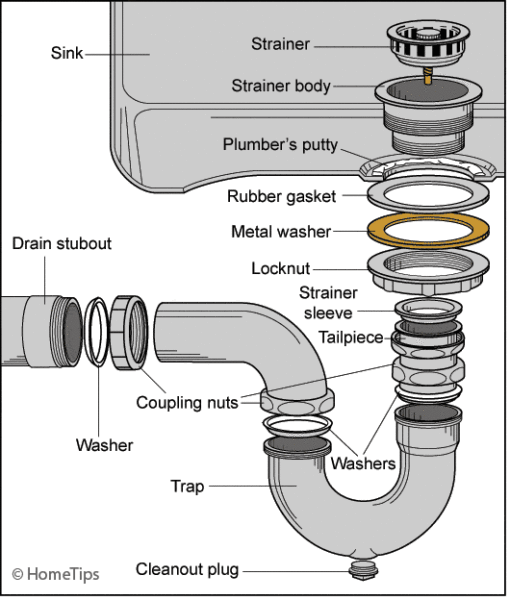
2. Assemble the sink drain and sink’s tailpiece. Apply a 1/4-inch rope of plumber’s putty around the sink’s drain hole and assemble the rubber gasket and drain pieces as shown or per the manufacturer’s instructions. The plumber’s putty should squish out from under the strainer collar as you tighten the locknut—clean up excess with a rag. Slide slip nuts onto the sink’s tailpiece, and then tighten the connection at the base of the sink. This step ensures that the drain components are securely linked, preventing any potential leaks.
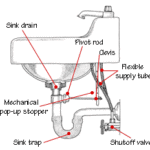
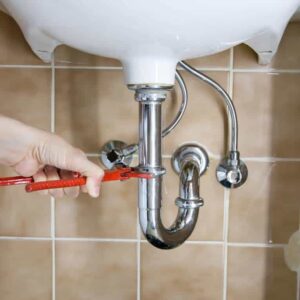
3. Install the P-trap. The P-trap is a crucial part of the drain system—it traps water at the bottom of the U-shape to prevent sewer gasses from entering your bathroom. Fit the P-trap in place and hand-tighten the coupling nuts. Using the slip-joint pliers, give the coupling nuts an additional ¼ turn to make them snug and guarantee a watertight seal.
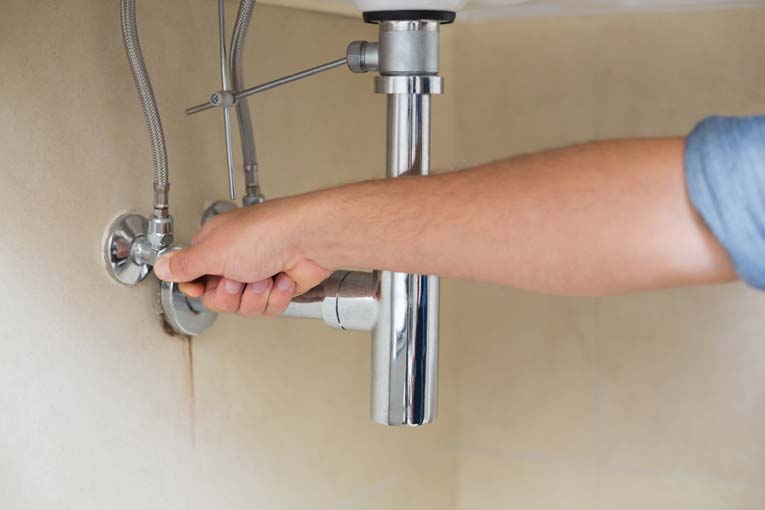
4. Connect the water-supply tubes. Connect flexible water-supply tubes onto the faucet’s tailpieces and route them to the shut-off valves at the wall. Hand-tighten the coupling nuts to secure the connections, then, using an adjustable wrench or pliers, gently snug them down ¼ turn.
5. Check for leaks. Before you finish, perform a thorough leak check. Turn on the water supply shut-off valves. Inspect the shutoff valves and supply tubes for any signs of leaks. Also, turn on the faucet to check for any drips or leaks in the drain assembly.
Final Thoughts
Connecting the plumbing for a new bathroom sink can be a rewarding DIY project. By following these simple steps, you can create a leak-free plumbing hook-up for your new sink. Then, every time you wash your hands or brush your teeth, you can enjoy the satisfaction of knowing you tackled this DIY plumbing task like a pro!
Here is a good video that walks you through the process of bathroom sink drain replacement. Watching this will help clarify the steps you take for installation.